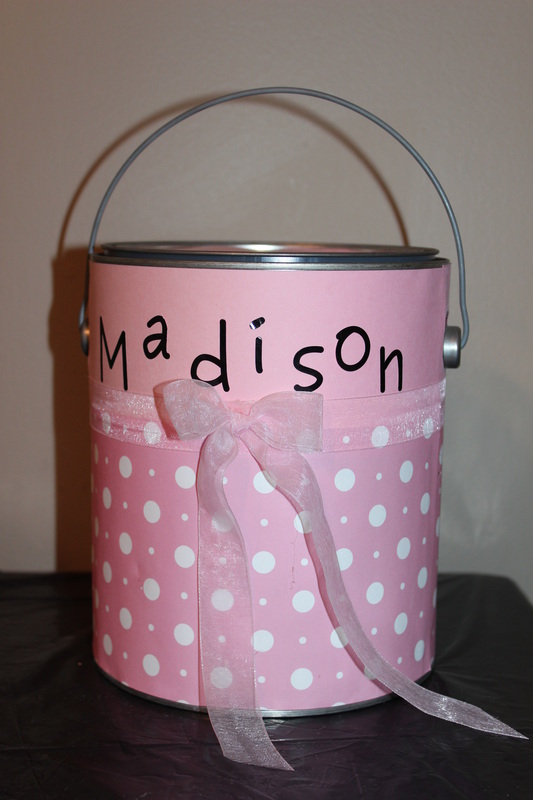
A friend of mine gave me a baby shower gift in an adorably decorated paint can (Madison). Not only is it a very cute gift 'box', but it doubles as storage for those smaller items that you want to keep for the baby (hospital bracelets, ultrasound pictures, the outfit that baby came home in, etc). It was the cutest idea that I had ever seen - so I had to copy it when I was invited to a baby shower. Here's what you do:
Materials:
- Empty gallon paint can (can be found at most hardware stores for about $5)
- Paper (I used scrapbook paper)
- Ribbon
- Glue (I used scrapbook glue, but I think the regular Elmer's glue would work just fine)
- Letter stickers for the name
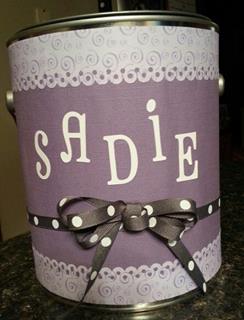
- Paper die cutter (optional - used on the Sadie can)
- Paint can wrap template (downloads as a pdf)
Directions:
First, cut out the template on plain paper to make sure that it fits exactly how you want it. Once you have done that, cut it out in the color and paper that you want and then glue it to the can (I only glued the edges of the paper together - this forms a seam, so be sure that this is not at the front of your can). Don't forget to glue the paper to the lid of the can too.
I then took coordinating paper and used my die cutter to cut a design into the edge of the paper. I then cut the paper to fit around the top and bottom of my can and glued it into place. Keep your seams in the same spot for a polished look.
I then took my coordinating ribbon and glued it around the can where I wanted it. I didn't make the ribbon meet in the front (there was a small space between the ends of the ribbon on the front of the can). I then made a small bow from the ribbon and glued it in that space where the ends of the ribbons didn't meet.
My final step was putting the name of the baby on the front of the can. I first placed my letters on wax paper and then held the wax paper against the can to get an idea of where I wanted to place the letters - this way I wouldn't ruin everything I did and have to start over! Once I had the letters where I wanted them, I put little pencil dots on the can and placed the stickers to cover it.
There you have it - the perfect gift pail!
Materials:
- Empty gallon paint can (can be found at most hardware stores for about $5)
- Paper (I used scrapbook paper)
- Ribbon
- Glue (I used scrapbook glue, but I think the regular Elmer's glue would work just fine)
- Letter stickers for the name
- Paper die cutter (optional - used on the Sadie can)
- Paint can wrap template (downloads as a pdf)
Directions:
First, cut out the template on plain paper to make sure that it fits exactly how you want it. Once you have done that, cut it out in the color and paper that you want and then glue it to the can (I only glued the edges of the paper together - this forms a seam, so be sure that this is not at the front of your can). Don't forget to glue the paper to the lid of the can too.
I then took coordinating paper and used my die cutter to cut a design into the edge of the paper. I then cut the paper to fit around the top and bottom of my can and glued it into place. Keep your seams in the same spot for a polished look.
I then took my coordinating ribbon and glued it around the can where I wanted it. I didn't make the ribbon meet in the front (there was a small space between the ends of the ribbon on the front of the can). I then made a small bow from the ribbon and glued it in that space where the ends of the ribbons didn't meet.
My final step was putting the name of the baby on the front of the can. I first placed my letters on wax paper and then held the wax paper against the can to get an idea of where I wanted to place the letters - this way I wouldn't ruin everything I did and have to start over! Once I had the letters where I wanted them, I put little pencil dots on the can and placed the stickers to cover it.
There you have it - the perfect gift pail!
 RSS Feed
